Transcript:
Today we’re talking about basic airway management, staying with the fundamentals. What’s most important is checking your equipment. Make sure you’re prepared before the emergency happens. Make sure you check your equipment in the ER, your crash cart in your ambulance before you start your shift. Be ready to manage that airway before it becomes a problem. Let’s take a look at some of the toys we use for airway management, starting with the adult Ambu bag.
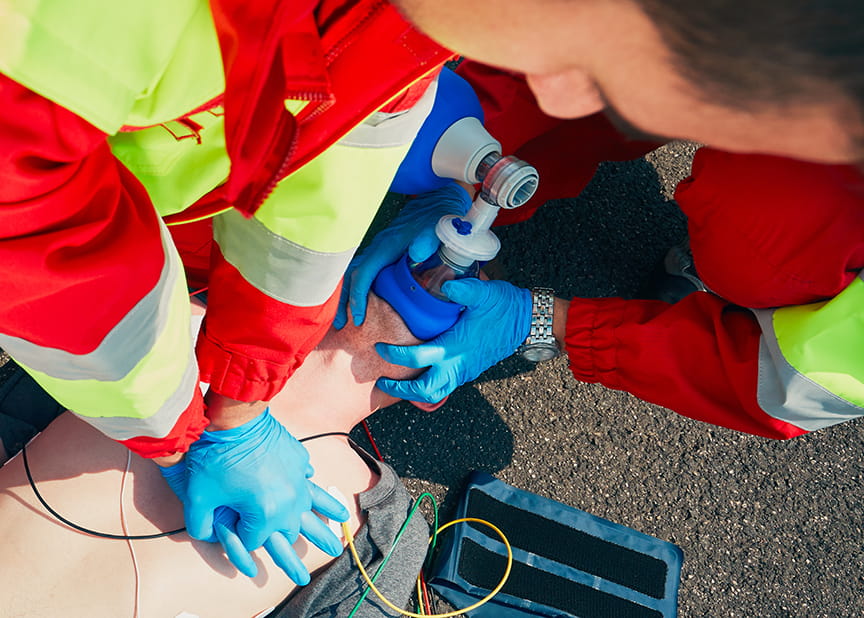
The adult Ambu bag, first of all, should be a self-inflating bag. What that means is when I compress the bag and give the breath, the bag reinflates all by itself. It doesn’t require oxygen to reinflate it. The mask should be clear so that we can see through it. This is in case the patient starts to vomit. If they start to vomit, we can pull the mask off and go ahead and suck out the airway. The risk is that they could aspirate some of that material into their lungs, so we want to catch them as soon as they start to vomit. The Ambu bag should have a reservoir on it that collects the oxygen so that we’re always administering 100% oxygen to the patient. The adult Ambu bag should be large enough, 1 or 2 L bag, so that when I provide the ventilations, I achieve good chest rise. That’s really what we’re looking for is good chest rise in the patient, so the bag has to be large enough to provide sufficient tidal volume to cause chest rise. How are your hands placed when performing that seal on the patient? The guy who invented it actually was Buckwheat from The Little Rascals when he went “O-tay.” That’s your hand position. Simply open up your two fingers and make that modified-C. If you remember “O-tay,” you’ll be O-tay. Your thumb will go over the nose at the bridge portion of the mask. The rest of the fingers in the O-tay will reach around so that you can grab that jaw and lift that jaw and then go ahead and provide ventilations for your patient.
Over-bagging, bagging too fast, bagging with too much tidal volume is also not a great thing. It’s frowned upon. Why? It increases intrathoracic pressure, which can actually reduce blood return to the heart. When we administer that breath, the time it takes to give that breath, the I-time (inspiratory time), should be 1 second, which is a lot longer than we think it is, really. You know, you give the breath, 1 second, 1 hippopotamus, slower breaths. We’ve all seen it in codes—the guy’s bagging and he’s slamming air into him really fast. The other problem is that when you reach about 20 cm of pressure, when you’re providing positive pressure ventilation, that opens up the esophagus. More air tends to go into the esophagus. We run the risk of gastric insufflation, regurgitation, and subsequent aspiration, so slow your bagging down. In the non-intubated patient, working in arrest, if they have a return of spontaneous circulation, you should give 1 breath of air every 5 to 6 seconds. This is on a return of spontaneous circulation, the patient’s not breathing, you’re going to give 1 breath every 5 to 6 seconds. If you’re just working a code and you’re doing chest compressions and are bagging the patient—they’re not intubated; it’s not an advanced airway; you’re just bagging him—ventilations and compressions have to be synchronized. You’ll give 30 compressions then 2 breaths of air with the Ambu bag over 1 second a piece. That’s 30 compressions, 2 breaths, and give each breath over 1 second. Once the patient’s intubated and we have an endotracheal tube in, compressions and ventilations can be asynchronous. They don’t have to be synchronized. Once you have an advanced airway and endotracheal tube, you’ll do compressions at a rate of 100 nonstop. Keep doing your chest compressions. Then you’ll provide 1 breath of air every 6 to 8 seconds, once the patient’s intubated. If you look at the guidelines, 5 to 6 and 6 to 8, the number that’s the same in both is 6 seconds, so if you stick with 6 seconds and remember 6 seconds, it will help with your testing.
Here’s another little fun tip about your Ambu bag you might not be aware of. Sometimes this little angle piece right here, between the mask and the Ambu bag, comes off. Sometimes it comes off and it falls underneath the CT scan table. Most Ambu bags are designed so that the mask will still fit to the bag this way—you don’t need that angle piece—and you can still ventilate the patient this way. It looks funny, but it works. I’ve seen plenty of codes come into the ER and they were bagging this way because that angle piece fell off and slid under the cot in the ambulance. Make sure that your Ambu bag can do that because that angle piece will fall off at the most inopportune time and wind up somewhere where you can’t get to it. Make sure you can still Ambu bag your patient, and make sure you have a spare Ambu bag handy in case it doesn’t. The Ambu bag. Get rid of that.
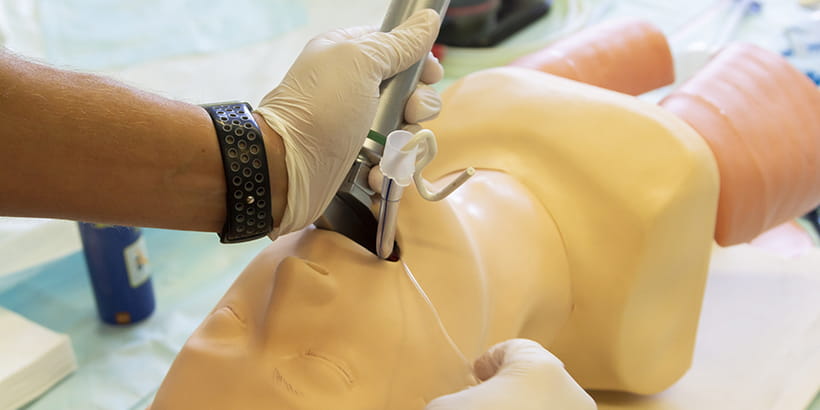
Next, the oral airway. Oral airways come in all different sizes and configurations. They need to be measured for the patient before you use them. Generally, we measure from the corner of the mouth to the angle of the jaw. It’s a rough guesstimate. More importantly is after the oral airway is placed, are you able to adequately ventilate the patient, causing chest rise. We want to see the chest coming up and down. The object of the oral airway is to get that tongue off the back of the throat. It follows kind of an anatomic form, and it gets that tongue off the back of the throat. That’s the function of the oral airway. The oral airway can only be used in a fully unconscious patient. If you put an oral airway into a patient who still has a gag reflex, you’re going to get this: . You do not want to be on the receiving end of a vomit cannon. I’ve seen it. I’ve seen it happen to people. Was it funny? Yeah. Did I laugh? Yeah. Protect yourself. If you’re doing airway management, you’re always going to have your BSI, your gloves, but remember face protection—a mask, goggles. Protect yourself from the inevitable vomit cannon.
Next, the nasal airway. Nasal airways are great for semi-conscious patients. These will be your drug overdoses, your profound alcohol intoxications, or maybe a resuscitated arrest who might have a gag but they’re still not breathing adequately enough and we want to give them a little support to get that tongue off the back of the throat. Insert a nasal airway. To measure these, generally you measure from the naris to the earlobe. Again, it’s a rough estimate. The true measure of any airway, whether it’s oral or nasal, is are you able to adequately bag, ventilate, and oxygenate the patient after the airway’s been placed. You should lube it up with a nonpetroleum-based gel. Surgery lube works fine. You have that in just about every drawer in the ER. Lube it up nicely, and use the right naris first. Why? Statistically, you’re right naris is bigger than your left naris. I didn’t do the study, just read about it. Try the right naris first, and be gentle when inserting these. You can cause trauma. The best way to stop bleeding is direct pressure. I can’t put direct pressure on the nasal turbinate if I cause bleeding back there, so be gentle. Slide it in following the contour of the airway until it rests right here at the naris. You’re not going to be able to go in any further. Another nice advantage to the nasal airway is I can pass a suction tube through here and suck out the back of the airway without causing more damage to the nose. It protects the nasal turbinate as I’m doing my suction. I can suction all the way to back of the airway going through the nasal airway.
When placing the oral airway, first remember to measure from the corner of the mouth to the angle of the jaw. Open the mouth in a scissor-type motion. The oral airway will initially go in inverted with the tip toward the roof of the mouth, placing halfway in the mouth, then rotating gently and finishing the insertion. The oral airway should rest comfortably in the airway while lifting the tongue off the back of the throat. Next, apply the Ambu bag. Remember O-tay. Thumb goes over the nose, reaching around and grabbing the jaw, lifting back, providing positive pressure ventilation with an I-time of 1 second. Go ahead, bag the patient.
Recommended Articles

Mask Ventilation
The importance of proper mask ventilation cannot be overstated. Healthcare professionals should be confident in the skills to manage a basic airway until more advanced airway experts arrive. Learn more!


